An Overview of Lighting In Unity #
Realtime vs. Baked #
There are two ways to render lights in 3D, on simulated materials. The first is realtime, and the second is “baked”. Realtime means that we calculate how the material looks every frame. Baked lighting means that the engine renders -in advance- how the light bounces all around, and then changes the look of various materials/textures in the scene accordingly. It saves this information to use later.
More information in the Unity Manual
With baked lighting way, one can have lighting that is expensive to calculate (and looks good), without significantly impacting the framerate of the scene. Of course, we can’t have dynamic realtime shadows and the objects can’t move around much, as it saved lighting data won’t update with it.
In practice, we combine both effects. We use baked lighting on objects that don’t move, with realtime lighting on top, which impacts moving and non-moving objects alike.
In Unity, both Mesh Renderer components (the surface) and the light components themselves have a setting to be realtime or baked.
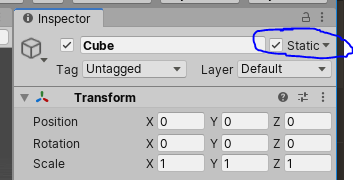
For GameObjects, we need to select static, in the top right of the GameObject settings in the inspector. This tells Unity that the object won’t be moving, and we should calculate it’s lighting in advance.
Most light types, in Unity, have a “Mode” dropdown. This is the lighting mode where the options are Realtime, Mixed, or Baked. Realtime and Baked are as explained. Mixed has it’s own sub-options, and is largely used to allow static and non-static objects to appear to interact with their lighting/shadows. For example, we can have static gameObjects cast shadows onto dynamic (non-static) gameObjects, by setting it to Baked Indirect or Shadowmask. More information: Lighting modes in Unity Manual.
Types of Light #
The Types Of Light page in the Unity Manual explains the various types well.
Setting up a Scene with Lights #
Set Static Property on GameObjects #
First, determine which objects should be static, and which ones shouldn’t be. Set various objects and their children objects accordingly. Roughly, set gameObjects to Static if they never move.
Add Lights #
Next, set up your lights in the scene.
You need lights where lights should be, a directional light for the “sun”, if required, emissive materials for screens and fancier 3D models, and so on. I tend to simplify complex light shapes into point lights, but that’s a bad habit. It depends on the scene.
Go to Window > Rendering >Lighting Settings, and set your environmental/ambient light setting appropriately. This is a “sourceless” light that I think of as a “shadow-fill”, your base brightness. It can keep your scene from looking too dim.
Normally light bounces around to lift up shadows and cracks, but we aren’t simulating a lot of this indirect/bouncing light, so ambient “Environmental Lighting” works well to fake this, and prevents your scene from being too dramatic or gloomy.
Configure Shadows #
Shadows are computationally expensive, but they also are pretty important for a scene to look good. Double check you aren’t casting shadows where you don’t need to be, and if you can use shadows with baked lights instead of realtime ones, do that. Especially for Deploying to the Oculus Quest.
Shadows can go missing from a number of different settings:
- Lights have a “Cast Shadows” option.
- Renderers have a “Cast Shadows” option.
- Renderers have a “Revieve Shadows” option.
- Your light’s distance could be too short.
- Realtime/baked setting confusion
- Something else, who knows. Good luck!
Configure Reflections #
We don’t generally have our shiny surfaces actually bounce and reflect light. Instead, we fake it. In order to fake it, we use something called a “Reflection Probe”.
A reflection probe basically captures a 360 image from a certain location and stores it, and then nearby shiny objects use that to figure out how they should reflect light.
If you have a mirror, put a reflection probe component on it, or on an empty gameObejct near it. Or in the middle of the room in front of it (GameObject>Light>Reflection Probe). Now fiddle until it looks good. Better yet, read the manual on the subject.
Reflection Probes won’t work until the lighting has been baked.
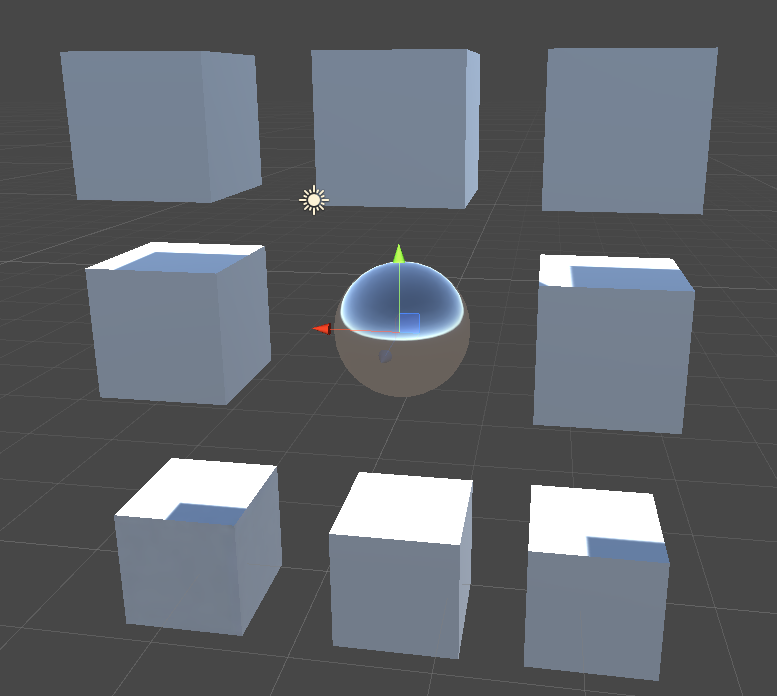
A unity scene before a reflection probe was added:
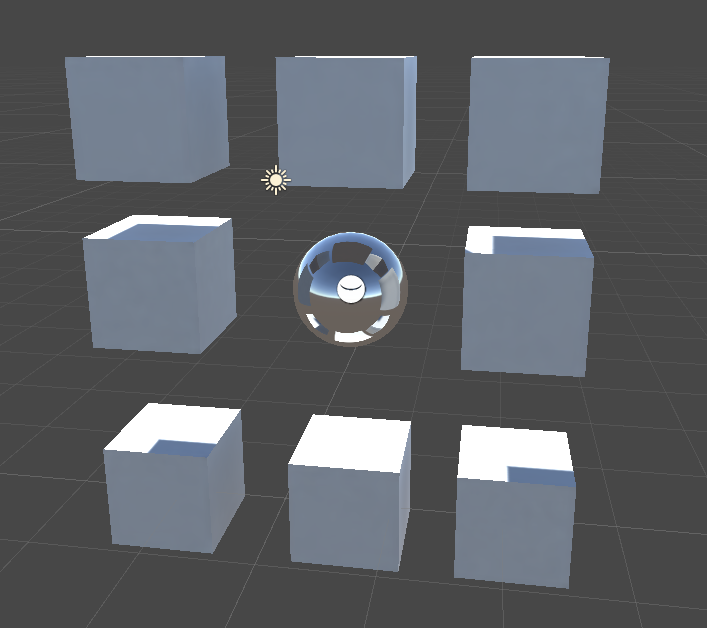
A unity scene after a reflection probe was added. The probe is a component of the sphere, but it could be on any nearby object.
Troubleshooting #
Consider the following cube that has been rendered without any environmental light calculated
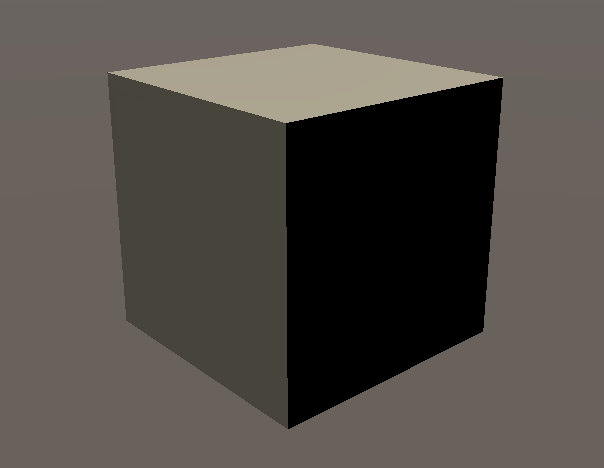
Note that it’s shadowy side is very dark. If your cube is looking like this, the problem is your environmental lighting. Sometimes called ambient light.
Compare it this cube, which is in the same scene after lighting has been baked. It’s shadowy side is might brighter - it appears to be lit by the sky and the ground, not just the sun.

Baking the lighting didn’t just bake the static object shadows, it also calculates what the environmental lighting should look like from a skybox
First, bake (“generate”) your lighting at least once, or go into your rendering settings, and change the environmental lighting from using a skybox as it’s source, to a solid color or gradient. Once generated once, we can use environmental lighting in addition to lights in the scene.
Consider the following cube that has not rendered with any baked lighting
Note that it’s shadowy side is very dark. Compare it this cube, which is in the same scene after lighting has been baked. It’s shadowy side is might brighter - it appears to be lit by the sky and the ground, not just the sun.
Next #
Next, I recommend you review and learn more in the Lighting Fundamentals] section.