Setting up Git & Unity with GitHub Desktop #
Keep In Mind Before Getting Started #
- Never put your “Library” folder into Git, or in any of your commits. We always want to tell git to ignore it.
- We do want to put “.meta” files in our commits.
- We can always destroy and restart the git side of things without losing any of our actual project work, or actual files. We should never have to give up work or re-do any work because of a git mistake.
- Using GitHub as a repository means publishing our projects, for free, on the internet. That’s awesome - but it means we can’t use assets if we don’t have a license to just give it away on the internet. We would, at least, need to make our github repository private.
- We don’t want to commit any very large files to git. If using very large files, such as some 3D models, we will need to explore a tool called “Git LFS”. LFS stands for “Large File Storage”.
- We don’t have to start with an empty project. You can configure (and unconfigure) git at any time.
Before Setting up a Project #
- Ensure everyone on the team has the exact same version of Unity installed.
- Only one person should create a Unity Project to start with, locally on their computer.
- Create an account with GitHub. Students should explore github’s education programs which, among other things, offer various discounts and services for students.
- The person setting up the repository will need to know all of the GitHub emails or usernames of the team.
One person will create and setup the Git repository. Then, the rest of the team will “clone” that, which will download the project and all of it’s configuration files, and go from there.
Setting up Github Desktop #
GitHub desktop allows us to initialize the local repository (on our computer) and the remote repository (hosted on github.com, which we will syncronize ours with) at the same time.
First, everyone should install GitHub Desktop.
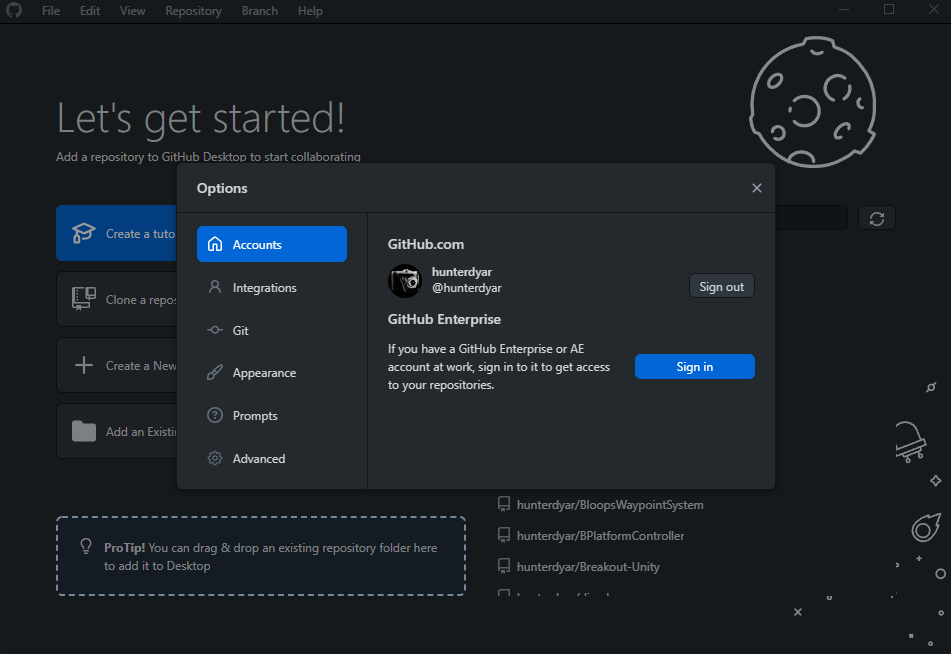
Make sure you are logged into GitHub Desktop with your github account. In GitHub Desktop, go to “File > Options > Accounts” and double check you are logged in.
Setting up the Initial Project #
The one user setting up the repository, only, should do the following steps to create a remote repository on github.com with the project set up there.
Create an unity project if you have not already. Be sure to use the version of Unity that your team is using. You do not have to close the Unity project or your IDE to setup git.
In Github Desktop, choose File > Add Local Repository.
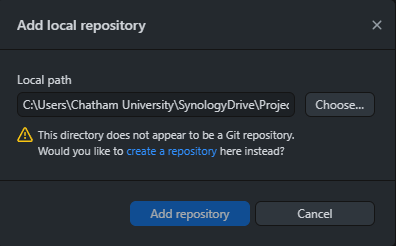
Navigate to the root directory of your Unity Project. This is the folder that Unity created, that has the same name of the project. Inside of this folder should be the “Assets” and “Library” folder and so on.
GitHub will give us complain that we do not have a project here. Select Create A Repository Here Instead.
 .
.
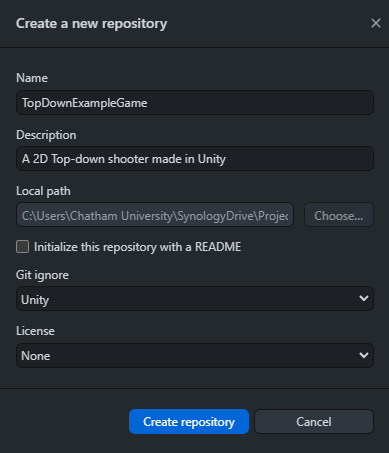
This will give us the following window.
Settings #
Name #
This should be auto-filled with the Unity project name, which should also be the folder name. Do not change it, it must match the folder name.
Description #
We can easily change the description later. It’s considered good ettiquite to mention the technology being used. ("…made in Unity").
Local Path #
By using the method we did earlier (“create instead”), this is greyed out and auto-filled with the correct path that we already selected. This makes it harder to mess up and create an empty git repo in a child folder of our git repository.
Initialize This Project with a README #
I prefer to do this later, so we can leave this unchecked.
Git Ignore #
Under Git Ignore, choose “Unity”.
License #
Choose a license, if you know which one to choose. You can always do this later.
Double check everything, then click “Create Repository”.
Publish To GitHub #
Let’s double check we created it correctly.
Double Checking Setup #
Select the “History” tab near the top left. Below the tab is a list of commits, and here we only have one, already created for us: “Initial Commit”. It should already be selected, but you can click on it to be sure.
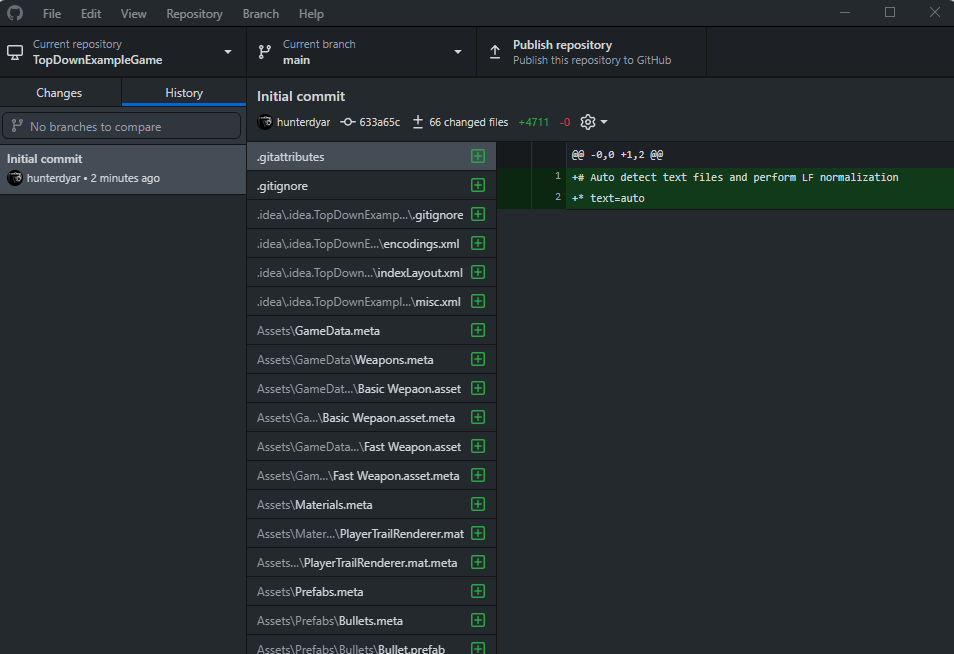
Take a look at the settings, and all of the changed files. Make sure that we do not see any “Libary” folders in the repository. We do want to commit the files in the Packages and ProjectSettings folers, and we should see some of those.
If you do see thousands of changes, and files in the ‘Libary’ Folder, we forgot to choose the correct gitignore. Right click on the “Initial Commit”, then chose “Undo Commit”. Then, go to the Repository Menu and select “Repository Settings”. Select “Ignored Files”, then paste the contents of this gitignore file into the textbox. Then select the changes tab. You should see less changes than you saw before, and none from the Library folder. Select all of the changes, and - with the ‘summary’ named “Initial Commit”, click “Commit to main”. Now you are ready to continue.
Publishing To Web #
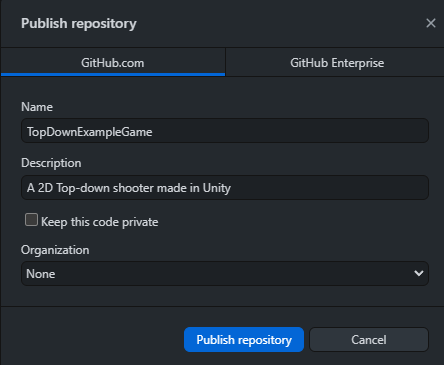
At the top of GitHub Desktop, choose “Publish To Web”. You can now, from the GitHub Desktop software, create a matching repository online. The settings here do not need to match the remote one. For example, you can choose a more descriptive name.
Uncheck “Keep This Repo Private” by default.
With the exception of working with assets (with licenses) that we should not be sharing online, it is convenient to work in public repos. It lets us easily find the project later, share it with others before we’ve added them as a collaborator, and let’s us otherwise check the status of things even if we are not logged in.
Organization will be “None”, this is fine.
 .
.
Now we can click “Publish repository”. It will upload all of our changes to a new remote repository hosted by github.
Go to your Github account. Select the dropdown by your profile icon in the top right, and select “Your Repositories”. This page, which shows you all of your remote repositories organized by date, should show you your just-created repository right at the top.
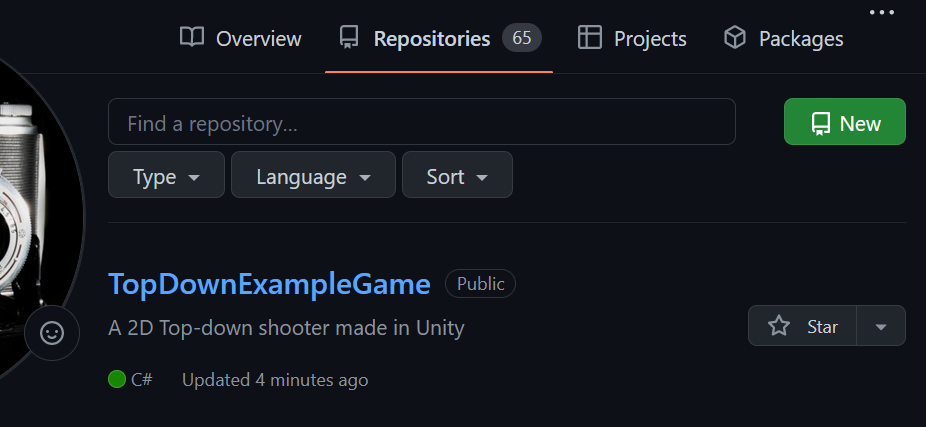
Click on it to go to the project. This is the project page, and you will need to give the URL of this page to all of your teammates, as they will need it in a future step.
We can view all of our files (but no Library folder!) on this page, and we can create a readme file from here, which we may want to do later. For now, go to Settings, and go to Collaborators in the settings page.
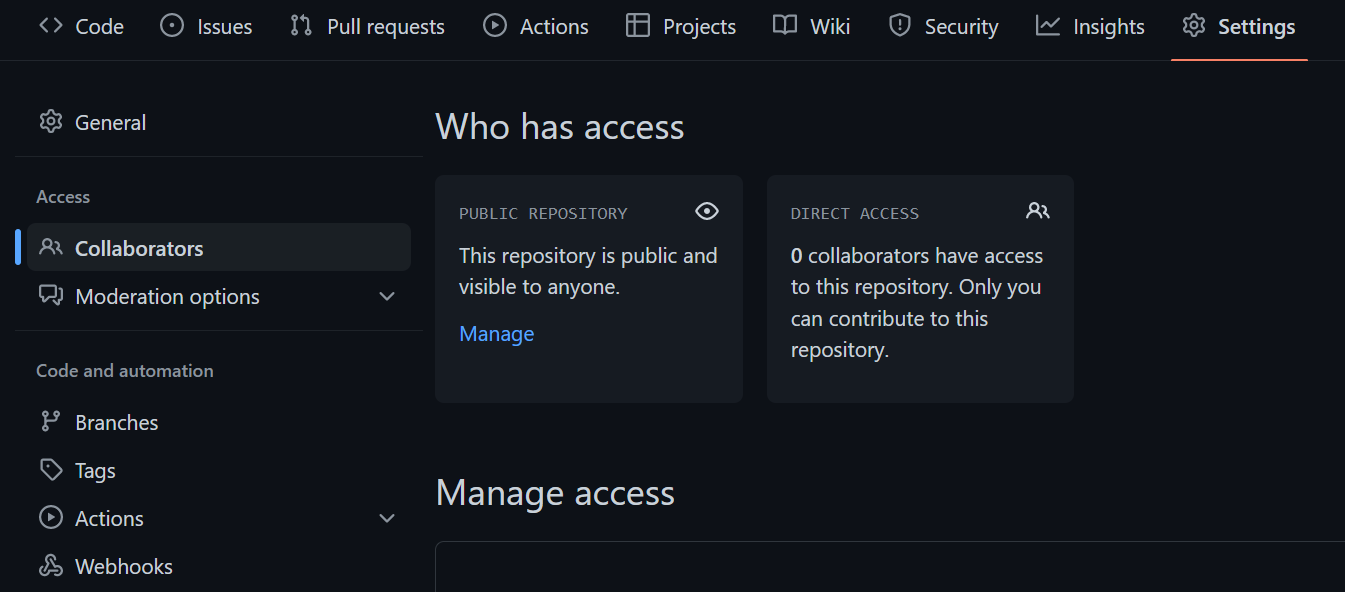
Choose Add People under ‘Manage Access’.
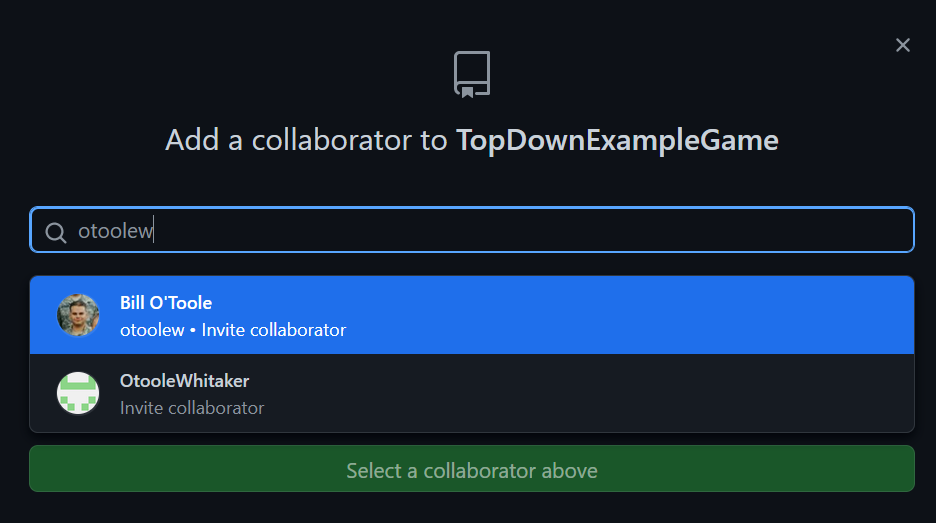
In the pop-up, add all of your teammates. You can enter the emails they used to create GitHub accounts, or their GitHub usernames. Add every member who needs access to be a collaborator.
Each person will receive an invitation that they have to accept. Tell them to check their emails, where github sent them a link to click that will accept the invitation.
They will get an email that looks like this:
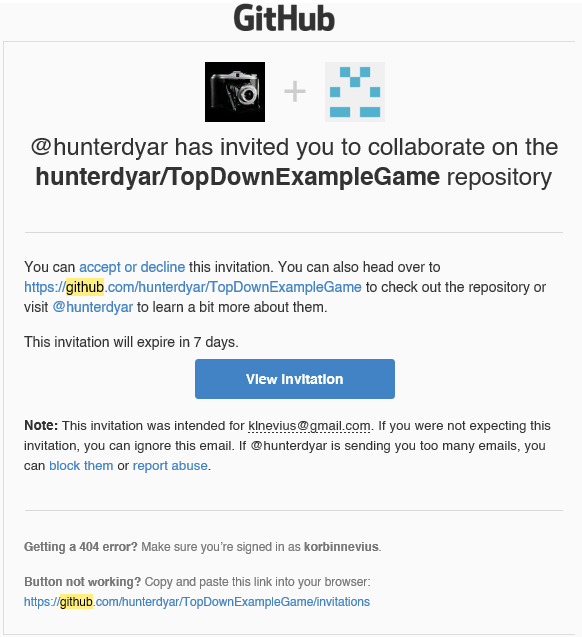
The link will send them to an accept invite page. Once they ‘Accept Invitation’, they will have permission to push their changes back to the repository.

Teammate Access #
The creator of the project is now good to go. Next, each other member will need to do these steps to clone the repository to their local machine.
First, select File> Clone repository.
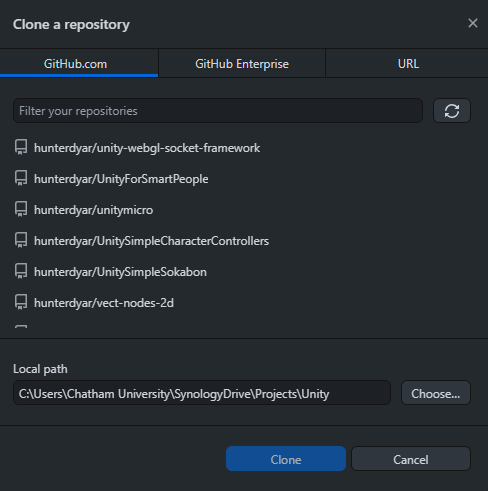
Here, you may be able to see the repository you have access to in the list, or you may not. If so, simply select in in the list.
If not, that’s no problem. Select “URL” in the dialog, and paste the github.com url of the repository (ie: github.com/[username]/[project-name]) into the Repository URL option.
For the Local Path, this will be the projects root folder. So double check we are putting it somewhere sensible, like with our other unity projects, and probably outside of any Dropbox, OneDrive, or Google Drive syncing folder. Remember this folder location.
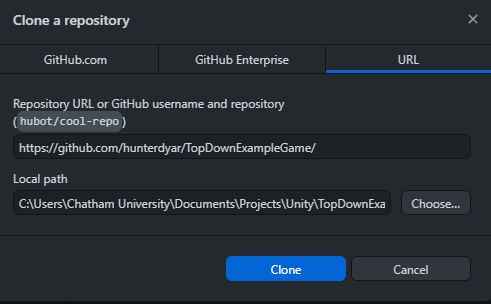
Select Clone. It will download the project to your computer. You now have a local copy of the project! Time to open it.
Open Unity Hub, and select the “Open” option to add a local Unity project. Find the project, remembering the local folder path from the previous step. In the dialgue box, we only need to navigate to the root directory of the project, and choose “Add Project”.

The Project should now appear in the list of projects in Unity Hub. If it has an orange triangle next to it, then we need to install the matching version of Unity.
You are now set up with the Unity project!
You can clone any public github repo (including mine), and make any changes you want (they are just files on your computer). You won’t be able to “push” those files to the “remote” repository without permission, which was the step of adding collaborators on github.com.