Video Capture with Unity Recorder #
Unity Recorder is a unity-built feature for exporting videos from the game view in Unity. It’s a great utility for assembling video documentation, and serves as an alternative to other capture tools.
Installing Unity Recorder #
Unity Recorder is not included by default in Unity, we have to install the feature from the package manager.
In Unity, open the Package Manager Window by going to Window > Package Manager in the menu.
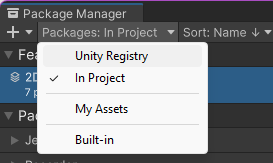
In the top-left of the window, change the ‘packages’ dropdown to switch to the Unity Registry.
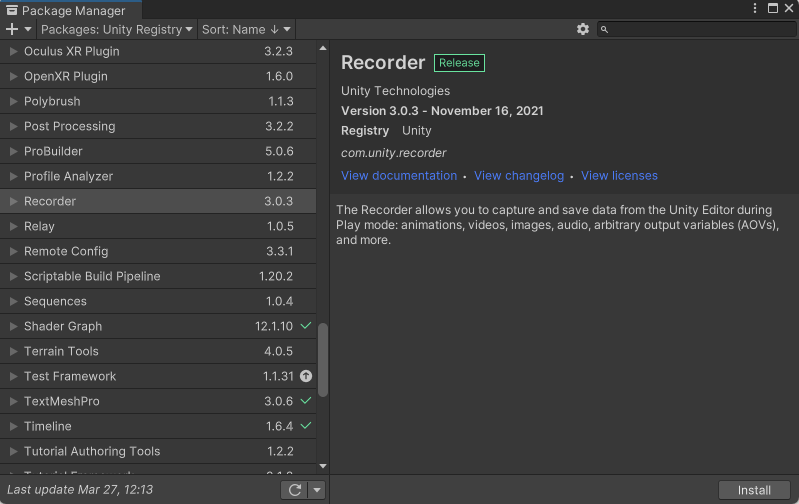
Scroll down and find the “Recorder” package, and select Install.
 .
.
Opening Recorder #
Unity Recorder should now be installed. To open it, go to Window > General > Recorder > Recorder Window.
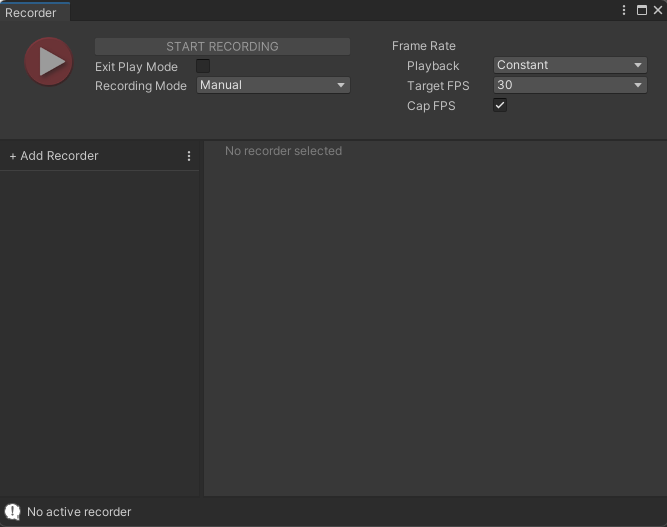
A window that looks like the following should appear.
 .
.
This is the empty recorder window. You will notice that the ‘START RECORDING’ button is not able to be selected. Before we can record anything, we have to configure settings for it to use. Each configuration is called a “Recorder” by Unity.
Adding A Recording Configuration #
Choose the “+ Add Recorder” option, and then select the appropriate option from the dropdown. (It’s probably ‘Movie’)
- Animation Clip - Record in the same internal format that Unity uses with the animation system. You could record a character moving around by performing the movement, then apply that to, say, an NPC. This would not be used for documentation, but for development purposes.
- Movie - Export a video file of the game window. Suitable for most cases in documentation.
- Image Sequence - Export every frame of recording as a separate image file. Useful if you want to recombine the images into footage later in another piece of software, where you have more control over video encoding settings.
- Audio - Export just the audio output from Unity as an audio file.
Recording Videos #
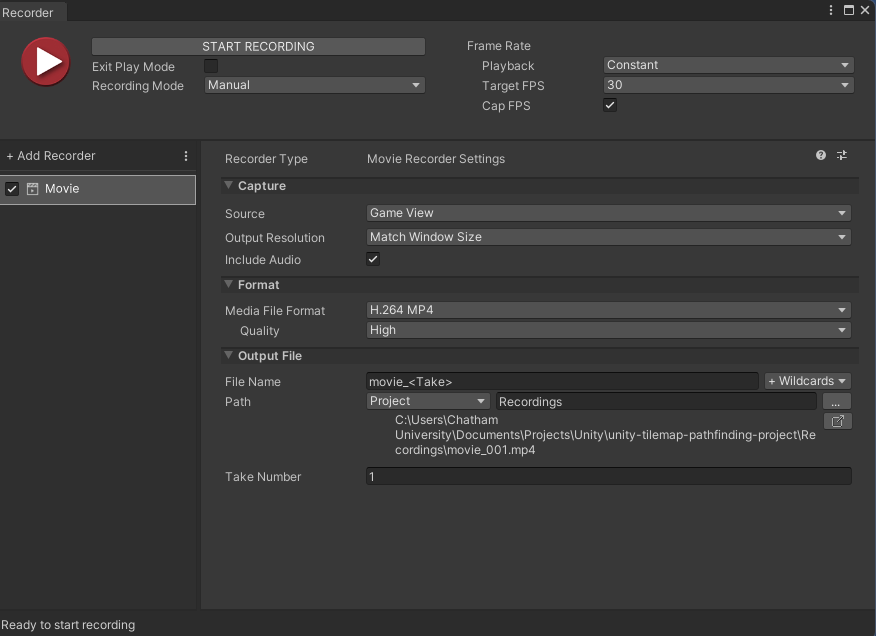
Having selected the ‘Movie’ Option, we can now configure the settings to our liking. For the most part, the default settings are good enough to get us started.
Changing Output Resolution #
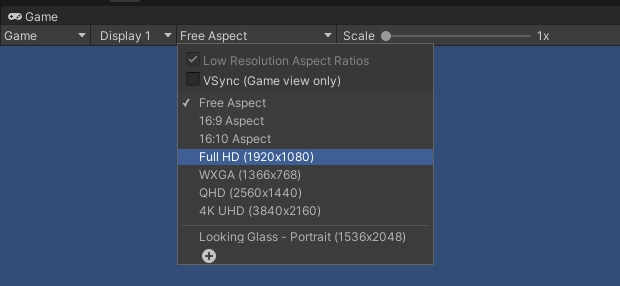
In the Movie Recorder Settings, I prefer to set my output resolution to a fixed size, usually “FHD-1080p” which is 1920x1080. I also change the resolution of my Game view to match. To do this, find the dropdown in the top left of the game window that usually defaults to ‘Free Aspect’. Change it to “Full HD (1920x1080)”.
Format & Quality #
H.264 is the standard encoding format for mp4 files these days, and will run on almost any device these days. It can be more computationally intensive to encode, so switching formats to do the recording and then converting them later is a viable option if one is low on computer power. For Quality, again, you probably want to choose the highest quality you can record well on your computer.
Output File #
I like to keep my recordings in the Project folder, although for personal preference I usually change the folder from “Recordings” to “Documentation”, and dump other non-video captures there too.
For the File Name, I like to add the
Recording #
To record, simply hit the Start Recording button, which will launch you into Play mode. You can also enter play mode first, and then click “Start Recording”.
I recommend not trying to perfectly start and stop the recording, but start beforehand, then focus on the performance, then stop; and trim the video after the fact.
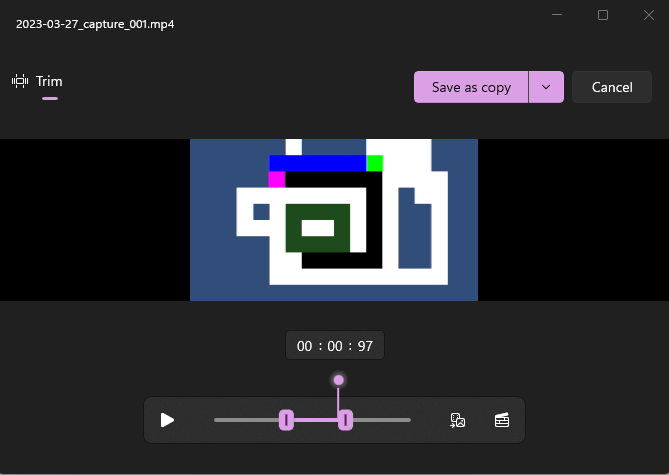
Trimming The Video #
You probably want to chop the beginning and end of the video off, at least a little bit, to keep concise and to-the-point documentation of your project.
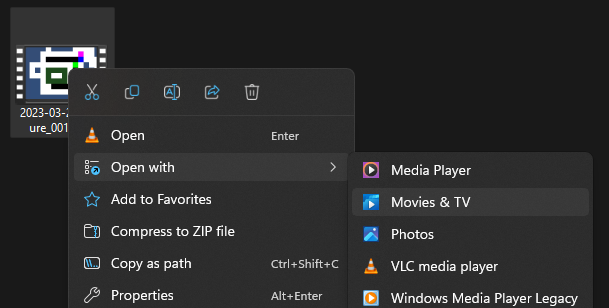
Windows 11 can do this with the built in software. First, open the video in the ‘Movies & TV’ app. Right Click, Open In, Movies & TV.
Then, choose the pencil icon in the bottom left, and under ‘Edit in Photos’, select Trim.
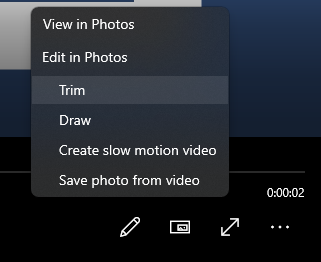
This will launch the video, now in the built-in windows ‘Photos’ app. Drag the handles on the timeline at the bottom to trim the video, and then choose ‘Save as Copy’ or ‘Save’ at the top right.