Instantiating Objects #
It is very common to need to create GameObjects during the games runtime.
Creating Objects from Scratch. #
To do that, one way is to simply create a new GameObject like we would any instance of a class. Doing this creates an empty GameObject. From there, we can use the AddComponent functions to set it up.
//Create a GameObject. Store a reference to it in a GameObject variable called 'something'.
gameObject something = new GameObject();

//Add a component to the gameObject.
something.AddComponent<Rigidbody2D>();

//Add a component via AddComponent and store a reference to the added component in a variable in one line of code.
SpriteRenderer somethingSpriteRenderer = something.AddComponent<SpriteRenderer>();

//With a reference to the component, we can start setting it up.
somethingSpriteRenderer.sprite = someSprite;
This will work, certainly. But it becomes pretty clear that this is a terrible solution. Setting up GameObjects via code is a pain in the butt, especially when Unity already has a great way to add and set up GameObjects: the unity editor.
Cloning Objects #
To clone an object, instead of creating one from scratch, we can use the Instantiate function.
Any script component can call it. We can give it a GameObject as a property, and it will clone that GameObject.
public GameObject objectToClone;

void Start()
{
    Instantiate(objectToClone);
}
The most common use case is to assign a prefab to the public field.
[SerializeField] private GameObject explosionPrefab;

void MakeExplosion()
{
    Instantiate(explosionPrefab);
}
Choosing Where to Spawn the GameObject #
The Instantiate function can also take more properties. The most commonly used “version” of the function takes an Object to clone, a Vector3 for the position, and a Quaternion for the objects orientation.
An Important Note about Orientation #
It’s easy to think of an object as not having a rotation, because we use the word “rotation” to refer to both an Objects current orientation, and a change in that objects orientation. We also use Quaternions to define both things, just like we use a Vector3 to define both a world position and an difference to move that position by.
If it confusing, just remember we can have both “orientations” and “rotations” and they are stored with the same data type, but are semantically different.
Remember that even if its “not rotated”, we still have to tell it the appropriate orientation to spawn the object with. This is the Quaternion value.
The “default” orientation - 0 degrees around each axis - can be easily accessed with “Quaternion.identity”.
The ‘identity’ of addition is 0, because anything plus 0 is itself. The identity of multiplication is 1, as anything times 1 is itself. The rotation identity is… whatever it is, and similarly rotating something by the rotation identity will leave it’s orientation untouched.
So our Instantiate function needs a GameObject (or prefab) reference to clone, a Vector3 for position, and a Quaternion for rotation, in that order.
[SerializeField] private GameObject stampPrefab;

void MakeExplosion()
{
    Vector3 spawnPosition = new Vector3(1,2,3);
    Instantiate(stampPrefab, spawnPosition, Quaternion.identity);
}
What about Scale? The function will use the scale of the object we are cloning - usually defined in the prefab we clone from.
Storing a Reference #
What’s more, the Instantiate function will return a reference to the thing that we cloned. We can ignore it (as above), or store that returned value in a variable.
[SerializeField] private GameObject bulletPrefab;

//Create a bullet and set it's velocity to move forward.
void Shoot()
{
    GameObject bullet = Instantiate(explosionPrefab, transform.position, Quaternion.identity);
    Rigidbody bulletRB = bullet.GetComponent<Rigibody>();
    bulletRB.velocity = Vector3.forward*10;
}
When you write code like this, it’s important to keep our game loop in mind. The GameObject gets created in the current game loop, and that objects Start and Awake functions don’t run until the very beginning of the next game loop. Be careful not to override any changes you make while creating the object with code that happens in Start, it can be easy to get the order of things wrong.
Example #
The following code is taking from my TopDown Example project. The player rotates, and instead of doing the math (gross) to figure out where the “tip” of the gun is, I simply created an empty child gameObject at that position. This child moves and rotates with the player. bulletSpawnLocation is a reference to this child object’s transform component.
I am rotating the bullet with the assumption that it’s default rotation is visually facing right. I want to set the bullets orientation such that it visually faces the appropriate direction. I use using the Quaternion.FromToRotation function, because using the functions in the Quaternion class is much easier than figuring it out myself.
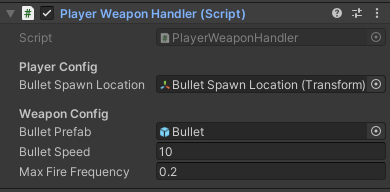
This script uses Attributes to pretty up the inspector.
| |