Unity Guide to Implementing XR Interaction Toolkit for Oculus Quest VR #
Introduction: #
Welcome to the immersive world of Virtual Reality (VR) on the Oculus Quest headset! In this guide, we’ll walk you through the process of implementing the XR Interaction Toolkit, a powerful framework for creating interactive and engaging VR experiences. By the end of this guide, you’ll be ready to dive into the world of VR and start building your own interactive applications.
Preface: Creating the game #
Upon opening the Unity Hub click new project.
Select 3d and name your project.
Click Create Project.
Section 1: Setting Up Your Development Environment #
Before you can start implementing the XR Interaction Toolkit, make sure you have the necessary tools and software installed. Follow these steps:
In Unity, go to “Edit” > “Project Settings” > “Player.”
Click on the Android button instead of the Windows tab which it starts on.
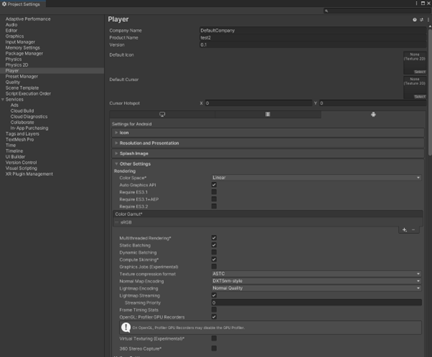
If the button for Android is not there, go to “File” > “Build Settings” and click “Install Android Modules” under the Android tab.
Section 2: Installing XR Interaction Toolkit #
Now that your development environment is set up, let’s integrate the XR Interaction Toolkit:
Download XR Interaction Toolkit:
Visit the Unity Package Manager (Window > Package Manager).
In the top left corner switch from Packages: in project to Packages in Unity registry.
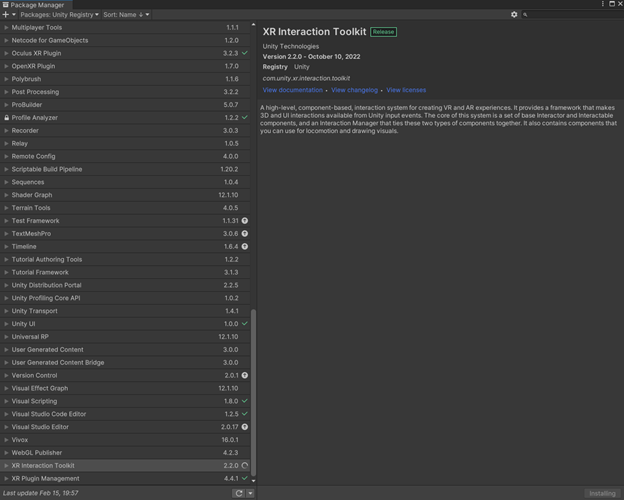
Search for “XR Interaction Toolkit” and click “Install.”
Under samples install sample assets.

Set Up Scene: #
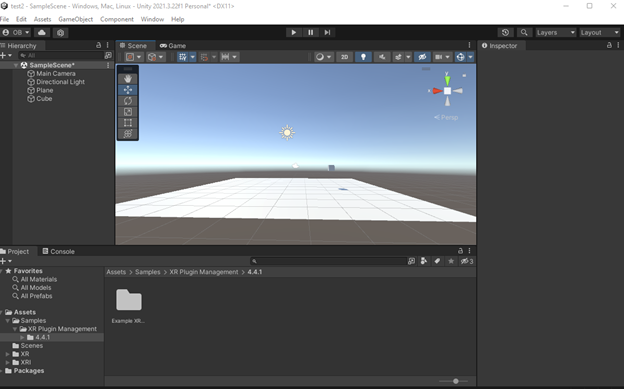
In the mid-top left corner hit the plus found under the word Hierarchy, select 3D object, and select plane, on the right side of the screen find the inspector tab and under Transform find the position slot and type 0 in all the position slots to center the plane in the scene.
Follow the same steps to make a cube. In the scale tab under the transform tab in the inspector, assign the values .3 to all slots. Then grabbing the green arrow pointing vertically, drag the cube above the plane. Also, drag it to one side of the plane so you can reach and grab it later.
Your scene should look like this now:
Set Up Interactions: #
Delete the Main Camera object.
In the mid-top left corner hit the plus and select XR
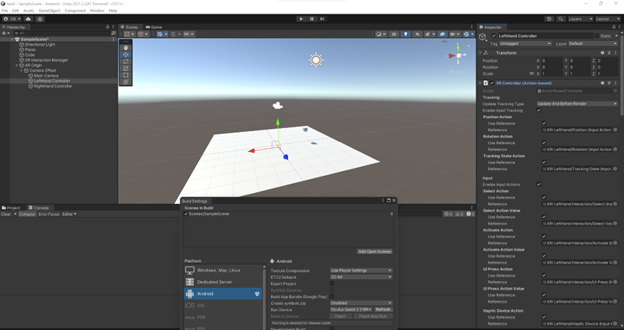
Add the “XROrgin(Vr)” prefab from the XR Interaction Toolkit to your scene.
Click the arrow on the left side of the screen that is on the XR Origin object, do the same to the Camera Offset, select the LeftHand and on the right side of the screen click the second to the right button that looks like two sliders and Select XRI Default Left Hand Interactions. Do the same but for the right hand, making sure to select the XRI Default RightHand Interactions.
Implement Interactable Objects: #
Select the Cube object.
Under the inspector select Add component.
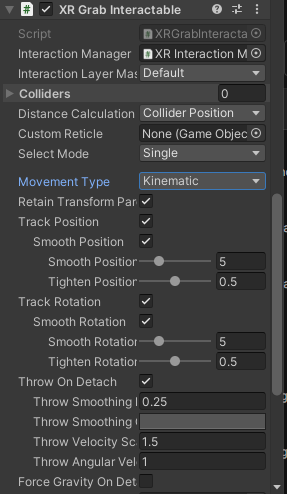
Add the “XR Grab Interactable” component to these objects.
Select the options: smooth position on and smooth rotation on.
Switch the movement type to kinematic.
Section 3: Configuring Locomotion #
Now, let’s configure how users will interact with the VR environment:
Select the XR Origin.
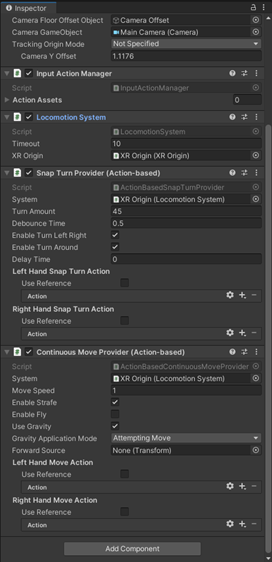
Add a component labeled locomotion system In the slot labeled XR Origin (None) select the above xr origin and drag it into the slot.
Great! Now movement and turning can be handled a few different ways depending on what you want.
- Add a new component, either a snap turn provider (action-based) or a Continuous turn provider (action-based).
These will dictate how you turn, by pushing the joystick to either side you will either instantly snap to a new position or smoothly rotate to be looking in a new direction, chose based on the feel of the game you are developing.
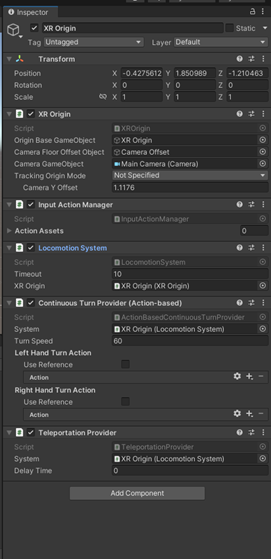
Drag the Locomotion System component from above into the turn provider “system” slot. Movement provider: Continuous movement provider (action-based) or a Teleportation provider.
Repeat the same steps with one of the following move providers.
Note: If using a teleportation provider you must make a cube, disable the mesh renderer, and apply the component teleportation area to it, the size of the cube is the area your player can move through.
Section 4: Testing Your VR Experience #
It’s time to put on your Oculus Quest headset and test your interactive VR environment!
Connect Oculus Quest to Unity: #
Enable Developer Mode on your Oculus Quest (follow Oculus documentation).
Connect your Oculus Quest to your computer with a USB C cable.
Build and Deploy: #
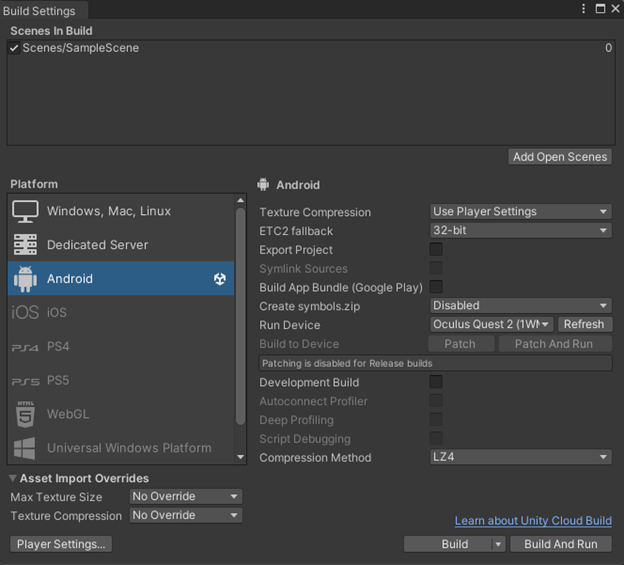
In Unity, go to “File” > “Build Settings” and select your target platform as Oculus Quest.
Make sure the right scene is selected at the top of build settings, and that your headset is selected under the Run Device tab.
Click “Build and Run” to deploy your VR application to the Oculus Quest.
Enjoy Your VR Experience: #
Put on your Oculus Quest headset and explore the interactive environment you’ve created.
Congratulations! You’ve successfully implemented the XR Interaction Toolkit for Oculus Quest VR. Now, let your creativity run wild as you continue to enhance and expand your VR experiences. Happy coding!